PROPER VCT FLOOR TILE MAINTENANCE PART II – SCRUB AND RE-COAT

Here at The Cleaning Supply Mart, we want to do everything we can to ensure that you have the floor cleaning products and supplies you need to keep your commercial floors looking their best. In our prior post, we reviewed how important routine maintenance and cleaning is for a vinyl composition tile (VCT) floor. In addition to regularly maintaining and cleaning your VCT floor with pH-neutral floor cleaning products, scrubbing and refinishing your floors will help them retain their high-sheen gloss, enhancing the beauty of your property.
Eventually, every VCT floor will experience wear, leaving it dull and discolored from foot traffic. The amount of traffic and the amount of daily care the floor receives will determine how long it holds up. In most situations, it’s not necessary to completely strip and re-wax the floor, so long as you address the deterioration of the finish in a timely manner. Instead, you can do what is referred to as a “scrub and re-coat.” This process calls for using an auto scrubber or floor machine with a scrubbing pad to remove the top one or two layers of floor finish, as well as built-up dirt and grime. After the floor is scrubbed, you then apply several coats of fresh floor finish. Check out the materials and equipment you will need for this job, a detailed description of the process, and answers to frequently asked questions below.

VCT SCRUB AND RE-COAT
The amount of labor and payroll you need is impacted dramatically by using appropriate chemicals, tools, and equipment. You’ll note that we do not mention floor stripper as a necessary item. Floor stripper is not needed for this project because it’s too aggressive and will remove the wax completely. We’ll review this in further detail in part three of this series when we review the “strip and wax” process.
Materials and Equipment
For a successful scrub and re-coat project, you’ll need the following:
- A cotton-blend or microfiber mop
- A rayon-blend mop head
- Floor cleaner (soap)
- A combo bucket/wringer on wheels
- An auto scrubber
- Floor pads for scrubbing
- Wet floor signs
- A neutral cleaner for mop water
- A scraper
Mop Heads
 Use a cotton-blend or a microfiber mop head ONLY during the scrub portion of the project. Even when using an auto scrubber, you’ll still need a mop for the corners, edges, and small spaces where the scrubber won’t fit. Don’t use a “finish mop” that has rayon during the scrub portion of the project, as they are designed NOT to be absorbent because they are used only for laying down new floor finish.
- Be careful not to cross-contaminate. A cotton mop that’s been used in the restrooms should not be used elsewhere. Additionally, having the wrong chemicals in the mop head can affect the floor finish.
- Use clean mop heads; using dirty mop heads just swirls around mud!
The following cotton-blend and microfiber mop heads are great for this job:
- Rubbermaid® V Series Cotton-Cut End Wet Mop Head
- Rubbermaid® Super Stitch® Recycled Blend Wet Mop Head
- O’Dell Blue and Yellow Microfiber Wet Mop Head
Use a rayon-blend “finish mop” ONLY for laying down the new fresh floor finish once the floor has been thoroughly scrubbed. Mop heads are not expensive, and if you want a great-looking floor, one of the best things you can do is simply use a brand-new rayon mop head with each scrub and re-coat project. They CAN be laundered, but you don’t want to use a mop head that has ANY remnant of old finish in it. Examples of these types of mop heads include:
- Rubbermaid® Super Stitch® Finish Mop
- Staples White Rayon Wet Mop
- Rubbermaid® Super Stitch® Large Finish Mop
Floor Cleaner (Soap)
To prepare the floor, you’ll need to use a good floor cleaning product that is semi-aggressive in order to remove the top several coats of floor finish along with all the grit and grime, like Betco’s Fastdraw Ultra Floor Cleaner.
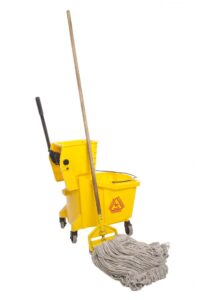
Combo Bucket/Wringer on Wheels
Use a 26-quart bucket for small areas, and a 35-quart bucket for large areas. See our website for a huge assortment of different styles available, such as this small bucket and this large bucket. Empty dirty water often to avoid putting dirt back on the floor. It is best to utilize separate buckets for clean water and dirty water, or inserts like this red one from Rubbermaid. This will save you labor and give you a better result!
Auto Scrubber (Optional)
If you’re doing routine maintenance on large tile areas, you can save many labor hours by using an auto scrubber, like the Predator 17 auto scrubber. Use a light scrubbing pad so you ONLY remove dirt and grime, and avoid removing layers of floor finish.
Floor Pads for Scrubbing
It’s important to use the right pads for scrubbing. If you use pads that are too aggressive, they will remove all of the floor finish, and you only want to do that when you are doing a full “strip and wax” project. We recommend using any pad that is designated as a “scrub pad.” These range in color from blue to green based on how aggressive they are.
Another VERY handy pad is called the “DoodleBug.” This is a small pad used for detail scrubbing on edges, corners, door jams, etc. where machines just don’t reach. These pads come in many colors, again based upon how aggressive they are. Brown DoodleBug pads are your best choice for scrub and re-coat project detail work.
Wet Floor Signs
In order to avoid slip and fall injuries that can cause lawsuits and insurance claims, be sure that you have posted “wet floor” signs.
Neutral Floor Cleaner
This item is critical to achieving a good result while protecting the floor’s finish. Follow the manufacturer’s instructions on dilution ratios; if you use too MUCH in the mop water, it will actually streak rather than clean! Check out our entire assortment of floor cleaners on our website! If you want to know more about floor cleaners/neutral cleaners, then be sure check out our recent blog post on the matter.
Scraper
As you mop, you will likely come across someone’s chewing gum, price stickers, or other problems that can be easily removed if you have the right tool, like this safety scraper.
 Scrub and Re-Coat Process
- Assemble all of the equipment, tools, and chemicals needed.
- Dust mop all areas that will be scrubbed and re-coated to remove trash and debris.
- Fill mop bucket to the prescribed level as indicated on the side of the bucket. Don’t overfill or water will slosh out as you roll it around.
- Carefully follow the instructions for proper dilution of any floor cleaning products used. Make sure that you measure, and don’t guess. Getting the right mixture is essential for good results. We recommend using dilution control systems like Diversey or Betco, as found on our website. The bottle measures the chemical FOR you. No measuring!
- Set out your “Wet Floor” signs in the area where you will be working.
It’s a good idea to start at the location in the building that is furthest away from your janitor’s closet or water source and work your way back towards that starting area. By doing this, you will never have to roll that mop bucket and auto scrubber back across a floor you’ve just cleaned. - After you’ve mixed the right dose of floor cleaner in the solution tank on your auto scrubber, run the machine over the areas to be completed. Review after the first pass, to see if the floors are clean to your satisfaction. Remember, if you take off TOO much of the existing floor finish then you’ll have to add more than two coats when you do the re-coat process.
- Using a smaller floor machine or DoodleBug, clean up areas like door jams, corners, edges, and other small areas, like inside the cash register stands in retail stores or toilet stalls in restrooms.
- Before proceeding to the re-coat step, make sure the floor is completely dry. Move the auto scrubber and mop buckets off of the floor so that they won’t track up your newly cleaned floor.
- After the floor is completely dry, fill the mop bucket with floor finish. To avoid cross-contamination between products, use a plastic trash bag as a liner for the mop bucket. This makes your clean-up a breeze later! Apply the wax to the flooring. Apply a thin and even layer of wax across the floor. Allow it to dry. Dry times can vary, but generally, a 45-minute wait between coats should work. After the wax has dried, test a small area before walking out onto the wax as this can leave footprints in the wax. If the floor is tacky or even slightly sticky, avoid walking on it until completely dry. For scrub and re-coat projects, two fresh coats are usually applied. You may want to apply a third coat in areas that required more aggressive scrubbing.
- Pro Tip: since you are typically not doing the entire floor area in a scrub and re-coat project, you will want to have “natural” boundaries for your new wax. Where the new wax ends on a floor is called the “cut line.” On one side of the cut line, there is the old floor finish. On the other side, there are the newly applied two coats. If you choose a natural boundary for your cut line, then the different finish appearances won’t be so pronounced.
After you’re done, it’s important to rinse out the mop heads with clear water until you’ve rinsed out all dirt and chemicals. Then, hang the mops so that the heads hang down, without touching the floor, so that they dry properly without encouraging mold or mildew.
VCT FLOOR SCRUB AND RE-COAT FAQS
QUESTION: How often do I need to do a scrub and re-coat on a VCT tile floor?
ANSWER: This depends upon two factors: (1) the amount of foot traffic, and (2) the weather conditions that impact the surface, like ice melt products and grit.
QUESTION: How many times can I do a scrub and recoat before it’s no longer effective and a full strip and wax is necessary?
ANSWER: The area you are doing scrubbing and re-coating could probably be done and redone many times, however, with the surrounding area being left undone, it will gradually deteriorate to the point where it makes much more sense to do a full strip and wax.
QUESTION: Is it ok to use a different kind of floor finish for the next two fresh coats on an existing base of some other kind of floor finish?
ANSWER: Generally, the manufacturers of floor finish advise that their finish can be applied directly onto other clean, dry finishes. The thing that will make ANY newly applied floor finish fail is a surface that is not fully cleaned. If your surface is very clean, then most finishes will work. Be careful to make sure you are using a matching gloss. Some floor finishes are called “matte” or “low gloss,” and if you attempt to apply high gloss to those, you will encounter problems as well as a distinct difference in the finished appearance.
SHOP FOR VCT FLOOR CLEANING PRODUCTS ONLINE NOW!
Are you ready to achieve professional-quality results when you scrub and re-coat your VCT flooring? If so, then look no further than The Cleaning Supply Mart for all of your VCT floor cleaning products. We carry a wide variety of vinyl floor cleaning products, including neutral cleaners, scrubbers, buckets, and more! Shop online with us today and enjoy free shipping on orders over $50!